Chapter Four
Using the Pen Tool
Moving on from the Pencil Tool and getting to grips with this more complicated but extremely useful tool.
The Difference Between the Pencil Tool and the Pen Tool
As shown in chapter three, the Pencil Tool simply requires that you click and hold the mouse button whilst dragging the mouse in order to create lines and shapes.
With the Pen Tool you simply have to click on the artboard where you want each “anchor” to be placed. Clicking and dragging creates “handles” which are used to create curves.
The Pen Tool can also be used to add and remove anchors from pre-existing paths and shapes created by the Pen and Pencil Tools.


Anchor Point
Handles
Drawing a Shape
Create a new document.
To draw a shape, select the Pen Tool from the Tool Bar.
Click once anywhere on the artboard and release. Then move your cursor to another location on the artboard and click again.
For the third anchor point, click and drag with your mouse before releasing. Finally, return to your first anchor, and when your cursor shows a small circle click on the original point.
As with the pencil tool, if your shape disappears when you de-select it, there has not been a stroke applied to the line. Re-select it and apply a stroke using the method described in chapter 2.
You can also hold down the Shift key to create lines at 45 degree increments.


3rd Anchor -
Click and drag to create handles
Return to 1st Anchor
Complete Path
Changing Direction
When drawing a curve you may want to change direction, or create a point.
To do this, click and drag as you normally would to create a curve but this time press and hold the Alt button when you create the handles.


Press and hold Alt to change the handle direction
Creates a "point” rather than a curve

1st Anchor
2nd Anchor


1.
2.

3.
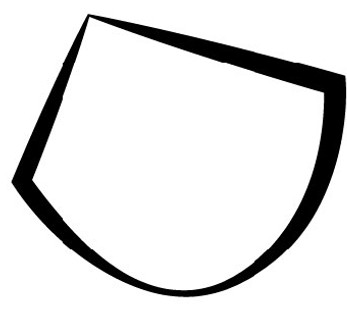
Circular Paths
To draw a circular path using the Pen Tool you simply have to click and drag when creating the first anchor point, as well as when creating any additional anchor points.
To finish the circular path, click and drag on the first anchor point.
Changing Path Thickness
The thickness of a path can be changed to suit your need.
In order to change the thickness of a path you have already created, select the path using the Selection Tool, then go to the “Stroke Thickness” drop down menu in the Control Palette.
From here you can select a range of thicknesses, but you can also click in the box next to the arrow and type in a custom thickness.
Additionally, the two arrows on the left of the box either increase or decrease the stroke thickness by one point.


Width Profiles
The standard width profile is a uniform thickness, as shown in the section above.
However, Illustrator also provides a range of “Variable Width Profiles” and you can make your own in Illustrator CS5 and above using the Width Tool.
To add a profile, simply select the path you want to apply the profile to, click on the Variable Width Profile box on the Control Palette and select the profile you wish to apply.
The Width Tool
In CS5 and above the Width Tool is available on the tool bar. This tool is extremely useful for creating non-uniform lines and removing that “drawn using Illustrator” look.
To use it, select the tool and hover over the area of the path you want to change the width of, click and drag away from the path until the path is the thickness you want it to be.
This new profile can then be saved by clicking on the Variable Width Profile drop down menu on the control palette and selecting the “Add To Profiles” button at the bottom.
This profile can now be used on any path in any Illustrator file.


The Width Tool
Path Caps and Dashed Lines
You can change the way the ends of your paths look using the Stroke Palette.
If the advanced options are not displayed simply click on the drop down menu in the palette and select “Show Options”
From these options you can choose how your path is capped, how the corners look, whether you have a dashed line and how long or short your dashes are.
Draw a right angle using your Pen Tool and apply a Round Cap and a Bevel Join corner.
Then apply a stroke width of 8pts, and a stroke colour of your choice.
Finally, tick the “Dashed Line” box and create a dashed line of 20pts, with a gap of 15pts and a smaller dash of 5pts, with another gap of 15pts.
Your result should look similar to the below:


If it does not, don’t panic! Play around with the settings and if you are still having problems, copy the settings below.

Arrowheads
The Stroke Palette also has a number of arrowheads that can be added onto the end or beginning of your stroke.
Select your dotted line and apply a different arrowhead to each end of the line, using the drop down boxes.
The arrowheads should be big and chunky. These will change depending on the stroke weight of your line.


8pt Path
2pt Path
Adding, Removing and Converting Anchor Points
Adding
To add a new anchor point to a path select the Pen Tool from the Tool bar and hover over the path you want to add a point to. When your cursor displays a + sign click on the path to add the new anchor point. Click and drag to add a smooth anchor point.
Alternatively, select the “Add Anchor Point Tool” from the rollout and click on the path you want to add an anchor to, or click and drag for a smooth anchor.


Removing
To remove an anchor point hover over the anchor you want to remove. When a - sign is displayed next to your cursor click on the anchor to remove it.
Alternatively, select the “Remove Anchor Point Tool” from the rollout and click on the anchor point you want to remove.


Converting
To convert an anchor point you can select the “Convert Anchor Point Tool” from the rollout menu and click on the point you want to convert.
You can also select the point you want to convert using the “Direct Selection Tool” and clicking the type of anchor point you want to convert it to from the “Control Palette”, which is only available when an anchor point is selected.
Alternatively hold the Alt button down when hovering over the point you want to convert so that the cursor changes into an arrow shape.


The Control Palette
Converts selected anchor points to corners
Removes selected anchor points
Joins selected anchor points together

Converts selected anchor points to curves
Show/Hide handles for multiple selected anchor points
Cuts path at selected anchor point
Reversing Handle Direction
With the Pen Tool selected hold down control on your keyboard to change to the Direct Selection Tool and select the anchor point you want to change. Then click and drag the handle (whilst still holding down the control button) to the position you want it to be in and release both the control button and the mouse button.

